 Version
7 User's Guide
Version
7 User's Guide
First Time Setup & Orientation
Go to the FILE
menu, the select Options.
Next, you can choose two custom fields and call them anything you want. These will be searchable fields. You can use Policy Number, File Number, Case Number, Social Security Number, Invoice Number, Cutomer ID, PO Number or any other label you choose for these fields: THIS IS OPTIONAL
This will change
the field names, now greyed out at the bottom of the CheckWriter
screen:
Enter in what you want them called and click OK.
Now they are
searchable fields in your database.
Next - also in the options menu, if you will almost always have the drafts pay to the order of the same name, enter the DEFAULT PAYEE and check off Use Default Account Information:
Like this -->
Leave the Account Number and Routing Number fields BLANK.
This will auto-fill the company name you type every time you create a new item. You can change it at any time, or you can just type over on a one time basis as well.
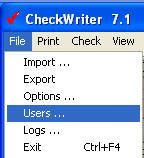
NEXT ---> GO TO File and Users
To comply with most new
data security laws and regulations, your customer's data should
be password protected inside CheckWriter with a password that is
at least 7 characters and alphanumeric like this:
5847lbY or oiKP42#
Like this:
With the single user version, the
username is always "admin" - only the password can be changed -
with the Duplex, Network or Enterprise Edition you can create
multiple username and password combinations.
Not changing the password can subject you or your business to
huge fines if the data is ever stolen or compromised, so don't
skip this step.
---->NOW that your
CheckWriter is set
up, you are ready to create
your first check draft.
For step by step directions
on
how create your first draft
- click here
CheckWriter™
is trademark product from yourfavorite.com.
© Copyright 1996-2012 All Rights Reserved.